Opening the screen for installing the Urban Cloud service
To begin the installation, you must first open the installation screen for the Urban Cloud service:
Opening the installation screen
Section titled “Opening the installation screen”Click, as shown in Screenshot 1 below, on buttons ➀ through ⑤ in sequence.
- In the left-hand sidebar of the touch terminal, click the bottom button
Settings➀. If you are in the main menu, where no sidebar is visible, press the buttonFeederto display the sidebar. - In the bottom toolbar of the touch terminal, click the second button from the left
Touch-Terminal Settings➁. - A series of menu items now appears in the left half of the central screen area. Click the bottom button
Accessories➂. - One (or possibly several) menu item(s) now appears in the right half of the central screen area. Click the bottom button
Urban Cloud Service. The button now moves to the left half of the screen. - At the bottom of the right half of the screen, the button
Open settingsis now displayed. Click this button; a popup window opens listing the steps for setting up the Urban Cloud service.
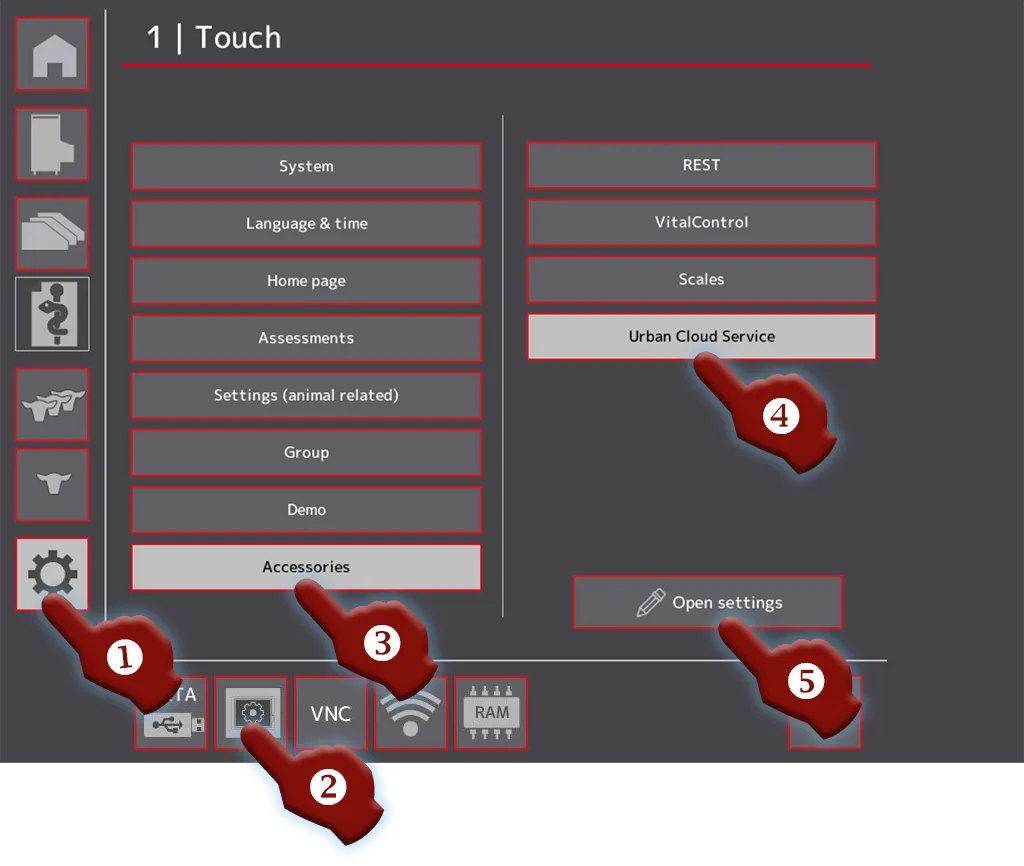
Screenshot 1: Alma Pro, opening the installation screen for the Urban Cloud service
Result of opening the screen
Section titled “Result of opening the screen”A popup window now opens showing an overview screen listing four installation steps:
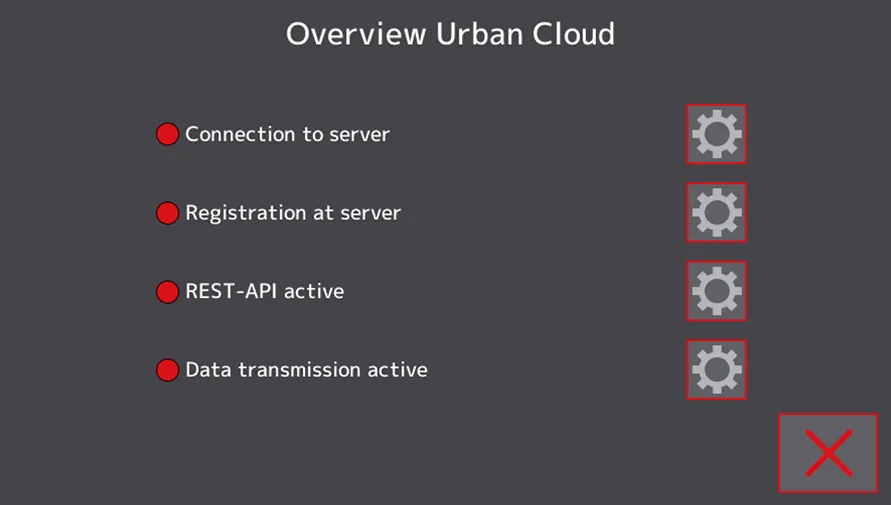
Screenshot 2: Alma Pro, Urban Cloud service installation screen