Activating the REST interface
Checking the status of the REST interface
Section titled “Checking the status of the REST interface”In the third installation step, it must be checked whether the touch terminal’s REST interface is activated and able to accept requests. The color of the circular status indicator (digit ➀) to the left of the third list entry REST-API active on the installation screen provides this information:
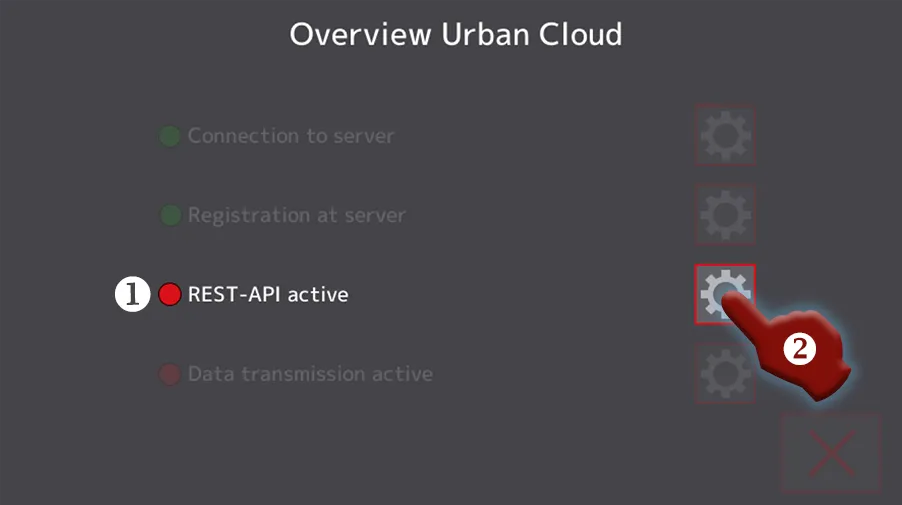
Screenshot 1: Cloud setup, REST interface activation status
- If the status indicator ➀ green lights up, the REST interface has already been activated. Everything is fine, and in the final installation step you can activate data transfer to the Cloud.
- If the status indicator lights up red, the REST interface has not yet been activated, and action is required.
- Tap the button (digit ➁) to the right of the
REST-API activelist entry to open the activation screen for the REST interface (Screenshot 2). - Activate the REST interface according to the instructions in the next section.
- Tap the button (digit ➁) to the right of the
Activating the REST interface
Section titled “ Activating the REST interface”The REST interface is activated on the following screen:
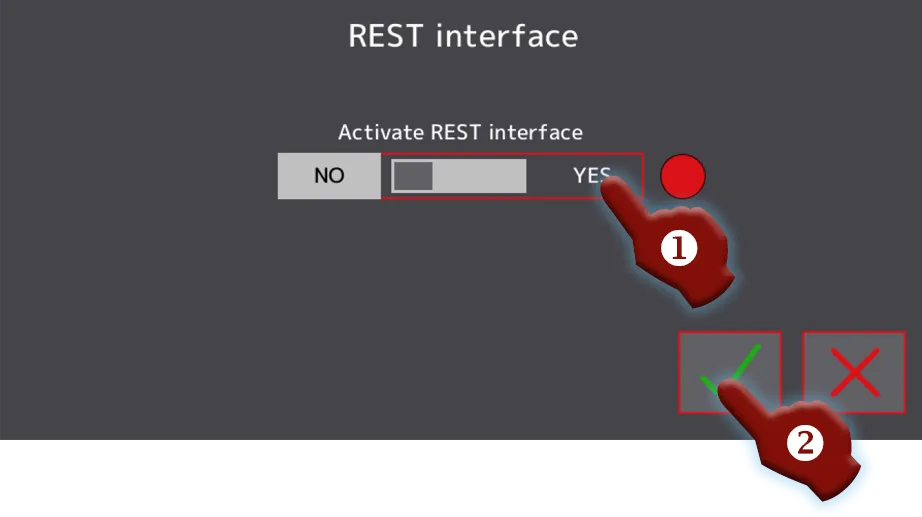
Screenshot 2: Cloud setup, activating the REST interface
- Tap the
YESoption on the toggle switch (digit ➀). - Tap the ✓ checkmark button (digit ➁) to apply the change.
- The content of the popup window now changes, and a large green checkmark ✓ appears, confirming the successful activation.
- Acknowledge this success message.
- The status indicator (Screenshot 1, digit ➀) to the left of the
REST-API activelist entry should now light up green, signaling that the REST interface has been successfully activated.
Now activate data transfer to the Cloud in the final installation step.